Mat Feed problem SDX & DX Machines

Have you suffered with a mat mis-feeding into your machines or even not feeding into it?

I have posted a link on YouTube with how I have overcome this problem : https://youtu.be/RxlvzH9XWw4

It is a very simple process of “shaving off” a tiny piece of the leading edge of the mat – the bit that feeds into the rollers. I think over time the rollers pinch the edge and maybe flatten it, not sure. I found that by running a pair of opened sharp scissors along the leading edge it resolved the problem and my mat now loads like a brand new one.

The secret is to only take the most miniscule amount off and try loading it before going any further plus make sure you clean any debris off before trying to load it. It took me 3 goes to achieve this but you could well do it on the 1st or 4th time, just remember you can take more off but you can’t put more back on so error on the side of caution each time.

Hope this gives hope and life back to your old mats. I have to say I a delighted as they aren’t cheap so I can continue to use my old, well used mat for things that aren’t too intricate and basic cutting and keep my new ones for really special cuts.

Happy Crafting

Anne x

Stamping Press

Just a quick note for anyone who has access to an “Action” shop – I don’t know if you get them anywhere other than France but you may have similar in your countries.

I picked up a Stamping Press yesterday for the princely sum of 4.69€ (approx. £4.00) – it is an amazing price – it comes complete with 2 magnets, a rubber mat and has both imperial and metric measurements – I just can’t believe how cheap it is – my best buy of the decade!

Scan n Cut plus Adobe Illustrator

I am not sure if those who use Adobe Illustrator (versions2019 and upwards) are aware that it is now possible to bypass Canvas Workspace and send cutting files directly to our Scan n Cuts ready to cut.

For me this is a game changer, I rarely work in Canvas but have always had to export my designs and then import them into Canvas, tweak if necessary prior to sending them to my machine. I now no longer need to do this 🙂

The plug-in from Adobe is free but the link from Brother costs around £26.99 at the time of writing this.

It is very simple to upload it and in moments you are up and running.

I have a glitch occasionally in that when I send a file directly, my Adobe momentarily stops responding, it might well be my computer but it rectifies itself in a few seconds so I just live with it.

Here is a link to my You Tube Video about it : https://youtu.be/5MYOnpGwu-w

Enjoy

Anne x

Fonts – what have you got and what do they look like?

Have you ever wanted to see what something looked like in a different font, or even in several different fonts? If so, join the club.

I have been pondering over this conundrum for ages – I know you can go into your fonts folder and see an example of any font on your computer but that is not the easiest solution.

After trawling the internet I have found 2 solutions that seem to do exactly that.

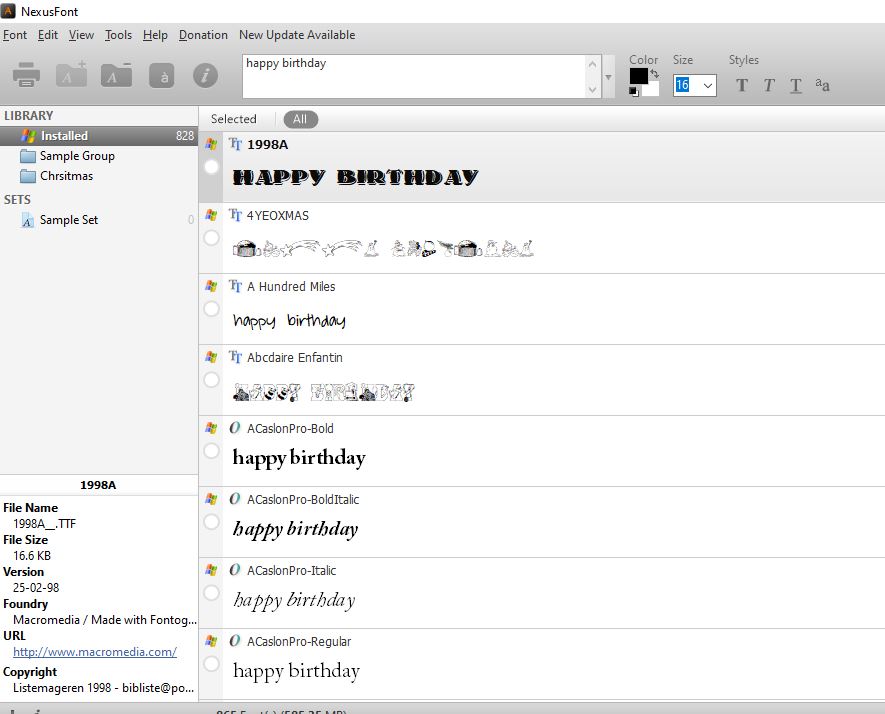
One is a free programme that you can install on your computer directly and it will gather all your fonts so that you can choose one or several fonts, type in a word/phrase and even change the colour of it to compare different fonts of your choice.   You can also categorise your fonts into different files which is a really useful tool for finding fonts specific to particular events/occasions without having to trawl through your whole library.  This is called Nexus Font


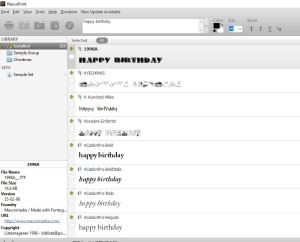
www.https://nexusfont.en.softonic.com/download


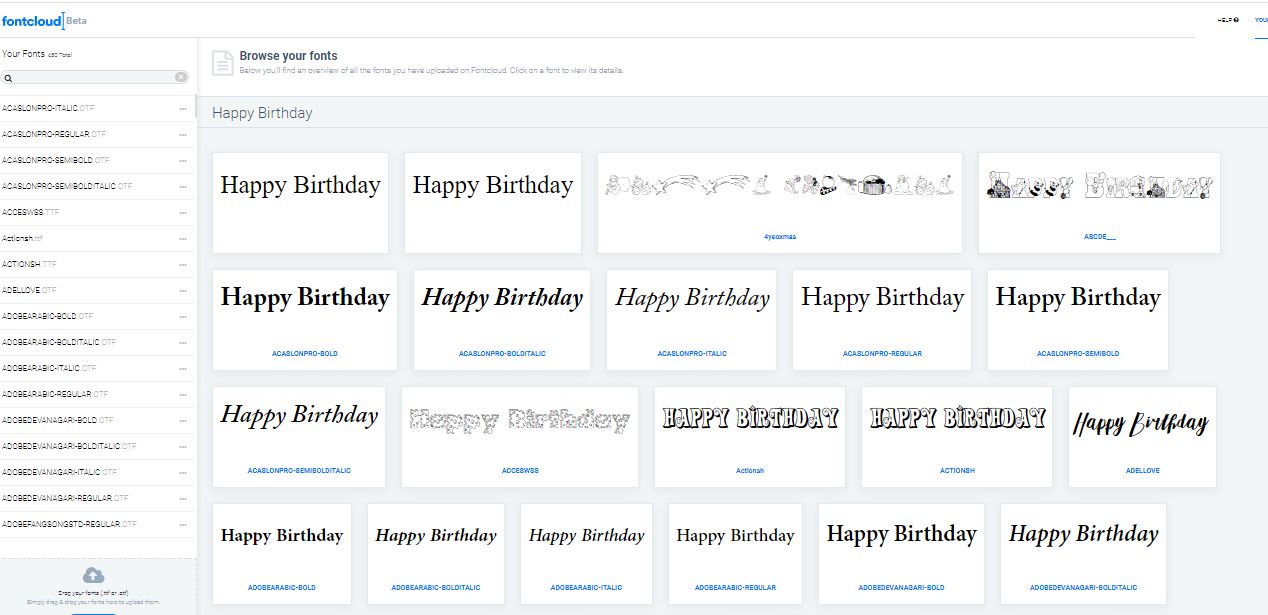
The other is a web based programme, also free but here you have to copy all the fonts into your library – it takes a little while but I found I could maybe copy 12 at a time and drag and drop them into the library. Again you can type in a word/phrase to see what it looks like but not sure there is a colour option. I don’t however think that is particularly a game changer. This is called Creative Fabrica Font Colud.

The one thing I did find with the second option that there is a “Private Use Area” (PUA) which I have never come across before! Certain fonts have this area which offer extras similar to those found in the Special Characters File and there are a myriad of wonderful things lurking here – really exciting.

On the downside of the second option it does take awhile to load the fonts into your library however you can copy several at a time which makes it a little quicker.  Once they are there job done you don’t have to do it every time.  You can load something like 10,000 fonts for free so more than enough space.

On a positive note it has lots of freebies in the font and graphics department as well!

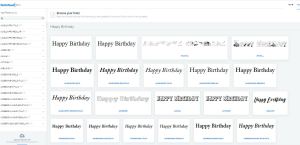
https://fontcloud.creativefabrica.com/apps/files/

Since using the web based option I have realised is that I have not installed all the fonts on my computer so I have more  than I actually thought so that was a result.

I haven’t done a video on these as there are loads I have since found on YouTube but if you have any questions or would like me to do one then please send me a message.

I trust you will find these useful and no doubt there are other similar applications out there but for me I am happy with these and will quite likely use both.

Happy crafting 

Anne 

Basic designing and cutting Vinyl

Hello everyone

Well it’s been a long time since I posted but as they say “better late than never”!

I actually did these videos at the beginning of the lock-down/confinement however I had problems getting the 2nd part of the video off my phone and have only just been able to resolve this problem.

This is a ‘back to basics’ video so if you are confident in your knowledge of your machine then it might not be for you

In the first part I show how to import, manipulate, replicate and group items in readiness for cutting either on a 12 x 12 mat which can be done on either the CM machines or the SDX machines or on the roll feed option which is only for the SDX machines.

Here is the link to the video – part 1

In the second part I am concentrating on cutting on the machine, weeding and adhering to a shiny surface such as a mug .  I now only have an SDX machine however, the CM machine using the 12 x 12 mat is very much the same procedure.  It is not possible to use the roll feed on the CM machines.

I do have to apologise about this video however.  I made the video not thinking about the fact that part of me would be visible in it.  Had I realised I would have worn something other than my ‘onesie’.  It was a Sunday and because of lock-down I was confident that no one would call unexpectedly so decided to have a ‘dress-down day’ – opps 🙂  It could have been worse, that’s all I’m saying!

Here is the link to the video – part 2

Hope this is helpful

Anne x

Automatic Machine up-dates for SDX machines

Hi everyone

I often see comments relating to updating our SDX machines automatically over WiFi so have done a short video showing how this is achieved.

I have assumed that you have already set your machines up to accept WiFi so have not covered this however, if you want me to cover this no problem just drop me a note.

I have not had a chance to edit my video so when you come to the second part where I say that I have paused the video to save you watching paint dry, you might want to fast forward a tiny bit and I didn’t click pause immediately!  Sorry.

Hope this helps at least someone

kind regards

Anne x


Foiling

Hi all

Just thought I would share a photo of a couple of cards I made recently. The first one is a split monogram courtesy of Font Bundles.  Done with the new WRMK foil quill on the Scan N Cut and then I used the waste via my GoPress and Foil machine – bits of foil missing were due to the fact that I didn’t tape the foil down correctly when I adhered it on my sNc – so user error!  Great result though nevertheless

The second card was using the medium blade to foil a simple greeting

Anne x

Foil Quill Tool

I received my We Are Memory Keepers Foil Quill on Friday and am very happy to say it was so easy to use and gave an amazing result.

To this end I have done a video to show you it used in conjunction with my Scan n Cut machine.

There are 4 adaptors in the packet so it can be used with other types of cutting machines – the adaptor I used was the “B” adaptor – which is very easy to remember as it stands for “Brother”!  The nib just screws into it and then it is ready to pop it into your blade holder on either the CM or DX machines.

There is a choice from 3 different “nibs” – fine, medium and bold and each nib comes with its own USB attached – you can plug the USB directly into your machine, into a USB power pack or, as I did, directly into a USB socket in a power point.

The nib doesn’t take too long to heat up so I would recommend plugging it in before you start to prepare your card stock and by then it should be ready to go.

It comes with a little metal protective plate to place under the nib whilst heating up however with the DX machines it was impossible to place this with any accuracy so I just left it heating on the side and placed it in the blade holder when I was ready to foil.

You must remember to set the design to a “draw” and not a cut file – I did show my project using both as I wanted to cut round the design after I had foiled it and this is very easy to do on the sNc


Thanks for watching

Anne x